Friday, August 3, 2012

Lightroom Tutorial - B&W

Lightroom is awesome, have I mentioned that before?

For my first official Lightroom tutorial I thought I'd start with a few simple edits for Lightroom newbies!

Today is how to turn your colour photo, into a black & white image. Now there are a gazillion ways to do this, but here is the quick & easy way.

- Start my importing your chosen photo.
- Go to the Develop area
- Here is my colour photo that I'd going to B&W


- On the menu on the right of the screen, scroll down to HSL/ Color/ B&W
- Click B&W & your photo will automatically be transformed!


- You can then either leave the image as it is & export (save) it. 
- Or you can adjust the colours in the image. On the screen shot above you can see on the right the colours. Your can move the curser to the left & right on each colour. Have a play around & get a feel for it. 
- I also adjusted the tones (exposure/ fill light/ blacks etc.) by sliding their cursers to the left & right.

Here is my final version.


You can see my changes to the Tone on the right. I increased the exposure, fill light & black.

Hope you like it & it'll help for future edits x

Camera Tutorial - be brave & step away from auto!

Well, it doesn't feel like that long ago my first ever DSLR landed on my doorstep.

A Canon 350D. It was so scary, there were so many buttons & dials & I had no idea where to start on the various settings.

The best way to learn, I feel, is by practice. I have taught myself how to use my camera & now it feel great that I can switch on my camera & know, more of less, what setting I will need to get the best picture for the setting I'm in.

I intend to give various tutorials over the coming weeks, to encourage you to be brave & try switch off auto!

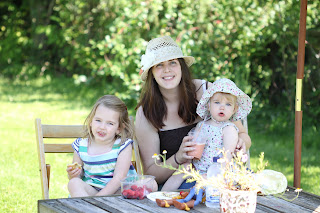
Below are two photos, taken by my husband of my two girls & me. 

The first photo was taken on 'auto'. Ok, not bad, it's an ok photo I guess, but any old camera could have taken that. 


So after a quick look at the photos, I adjusted the settings.  Increased the shutter speed a touch, widened the aperture, reduced the ISO & voilĂ .
These are both totally unedited, straight out the camera. But even a few subtle changes can make a huge difference.

What do you think? 


Next week we'll discuss aperture.... hold onto your hats...